Discover Windows' built-in Recovery Drive tool—a powerful yet often overlooked utility that creates bootable rescue media for catastrophic system failures. We break down how this legacy feature works, when to use it, and critical caveats about data protection every admin should know.
For IT professionals and power users, few moments induce more dread than a Windows machine refusing to boot. While modern recovery options exist within the OS, they're useless when the system won't start. Enter Windows' oft-forgotten Recovery Drive—a legacy tool quietly residing in both Windows 10 and 11 that builds emergency boot media on a USB drive.
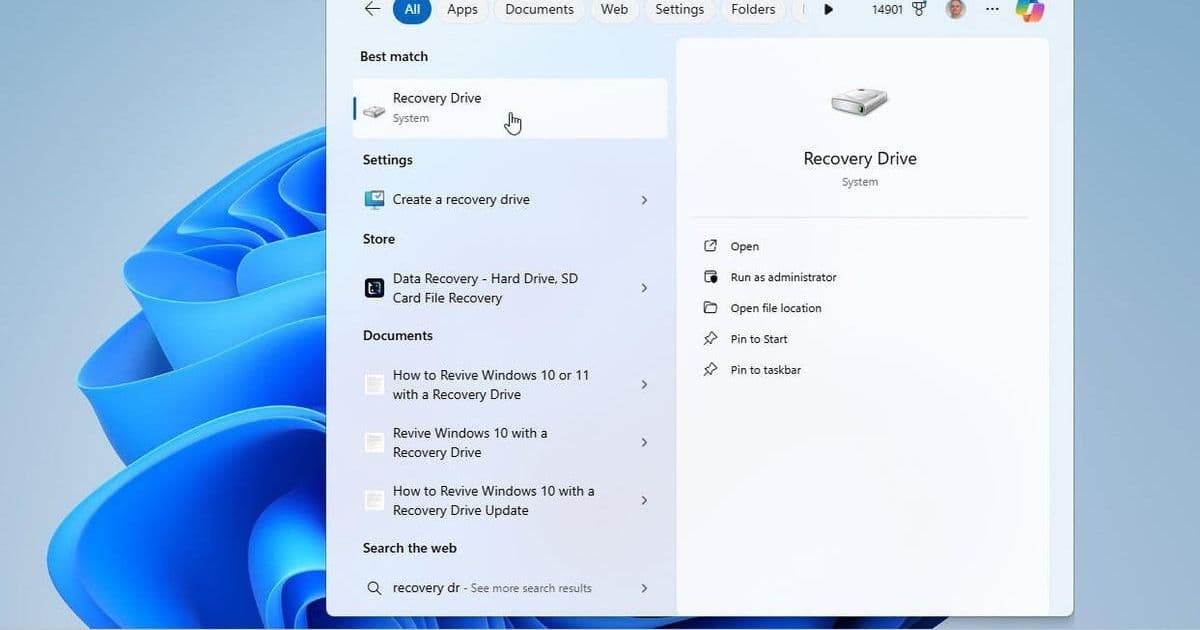
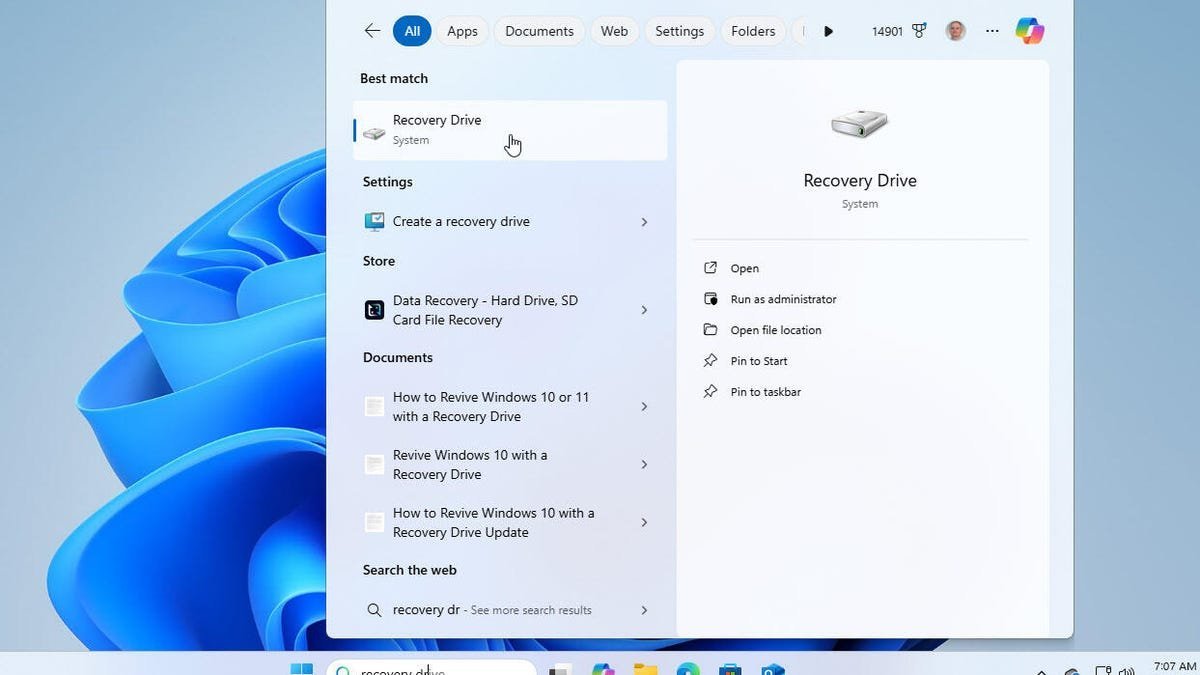 Caption: The Recovery Drive creation interface in Windows (Credit: Lance Whitney/ZDNET)
Why This Matters Beyond Standard Recovery
Unlike the 'Reset this PC' feature, Recovery Drive doesn't require a functioning Windows environment. It creates a bare-metal rescue disk containing essential system files, critical updates, and manufacturer customizations. Crucially, it strips personal files and third-party apps—making it a nuclear option when all other recovery methods fail.
"The Recovery Drive is your lifeline when Windows is completely inaccessible. But treat it as a last resort—it rebuilds the OS foundation, not your data," notes Windows expert Lance Whitney.
Critical Considerations Before Creation
- Data Loss is Guaranteed: Recovery Drive reinstalls Windows to factory state. Personal files and installed applications will be erased. Always maintain separate, verified backups.
- USB Requirements: A minimum 32GB USB drive is mandatory. Smaller drives fail during creation.
- Time Investment: The creation process can take over an hour depending on hardware. Plan accordingly.
Step-by-Step: Building and Deploying the Rescue Drive
- Initiate: Search "Recovery Drive" in Windows. Launch the tool and check "Back up system files".
- Select Media: Choose your 32GB+ USB drive (contents will be wiped).
- Create: Click "Create" and wait—this process is lengthy but critical.
Deployment During Disaster
- Connect the USB drive to the failed PC and access the boot menu (typically F12, ESC, or manufacturer-specific key).
- Select the USB drive as the boot device.
- Choose your keyboard layout, then select "Recover from a drive".
- Opt for "Just remove my files" unless performing secure erasure.
- Confirm recovery to begin Windows reinstallation.
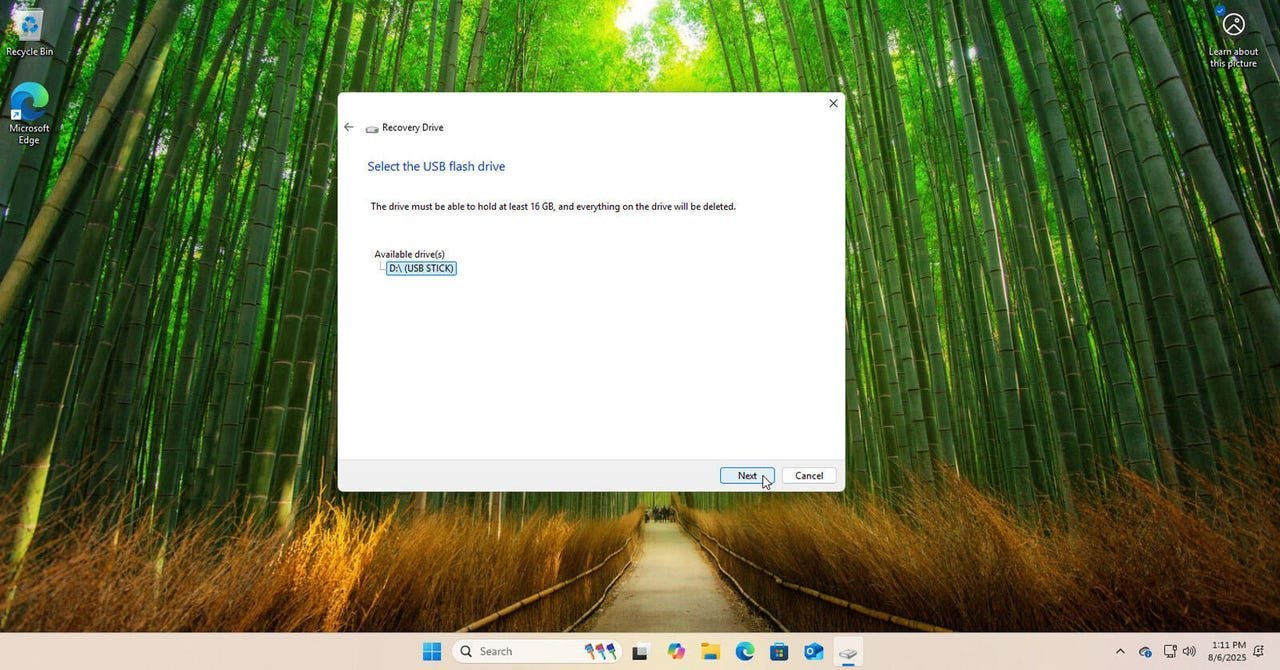 Caption: Booting from Recovery Drive during system failure (Credit: Lance Whitney/ZDNET)
The Aftermath: Restoration Realities
Post-recovery, you'll face a fresh Windows installation. This means:
- Reinstalling all third-party applications
- Restoring personal files from backups
- Reapplying system customizations
Strategic Placement in Your Recovery Arsenal
Position Recovery Drive as your final defensive layer—not a replacement for:
- Regular system image backups
- File history/versioning tools
- Cloud sync services
While overshadowed by newer features, this tool remains invaluable for resurrecting unbootable systems. Its existence underscores a fundamental truth: when hardware spins up but Windows refuses to dance, having physical control over recovery media shifts panic into purposeful action. Just ensure your data dances elsewhere first.
Source: ZDNET (August 2025)
Comments
Please log in or register to join the discussion