iOS 26's 'Screen Unknown Senders' feature frustrated me until I discovered the hidden notification settings that made it actually useful.
iOS 26 brought several welcome improvements to Apple's Messages app, but one new feature initially left me frustrated. The 'Screen Unknown Senders' option, designed to filter spam texts, wasn't working as well as I'd hoped until I discovered a crucial setting buried in the iPhone's menus.
The Promise of 'Screen Unknown Senders'
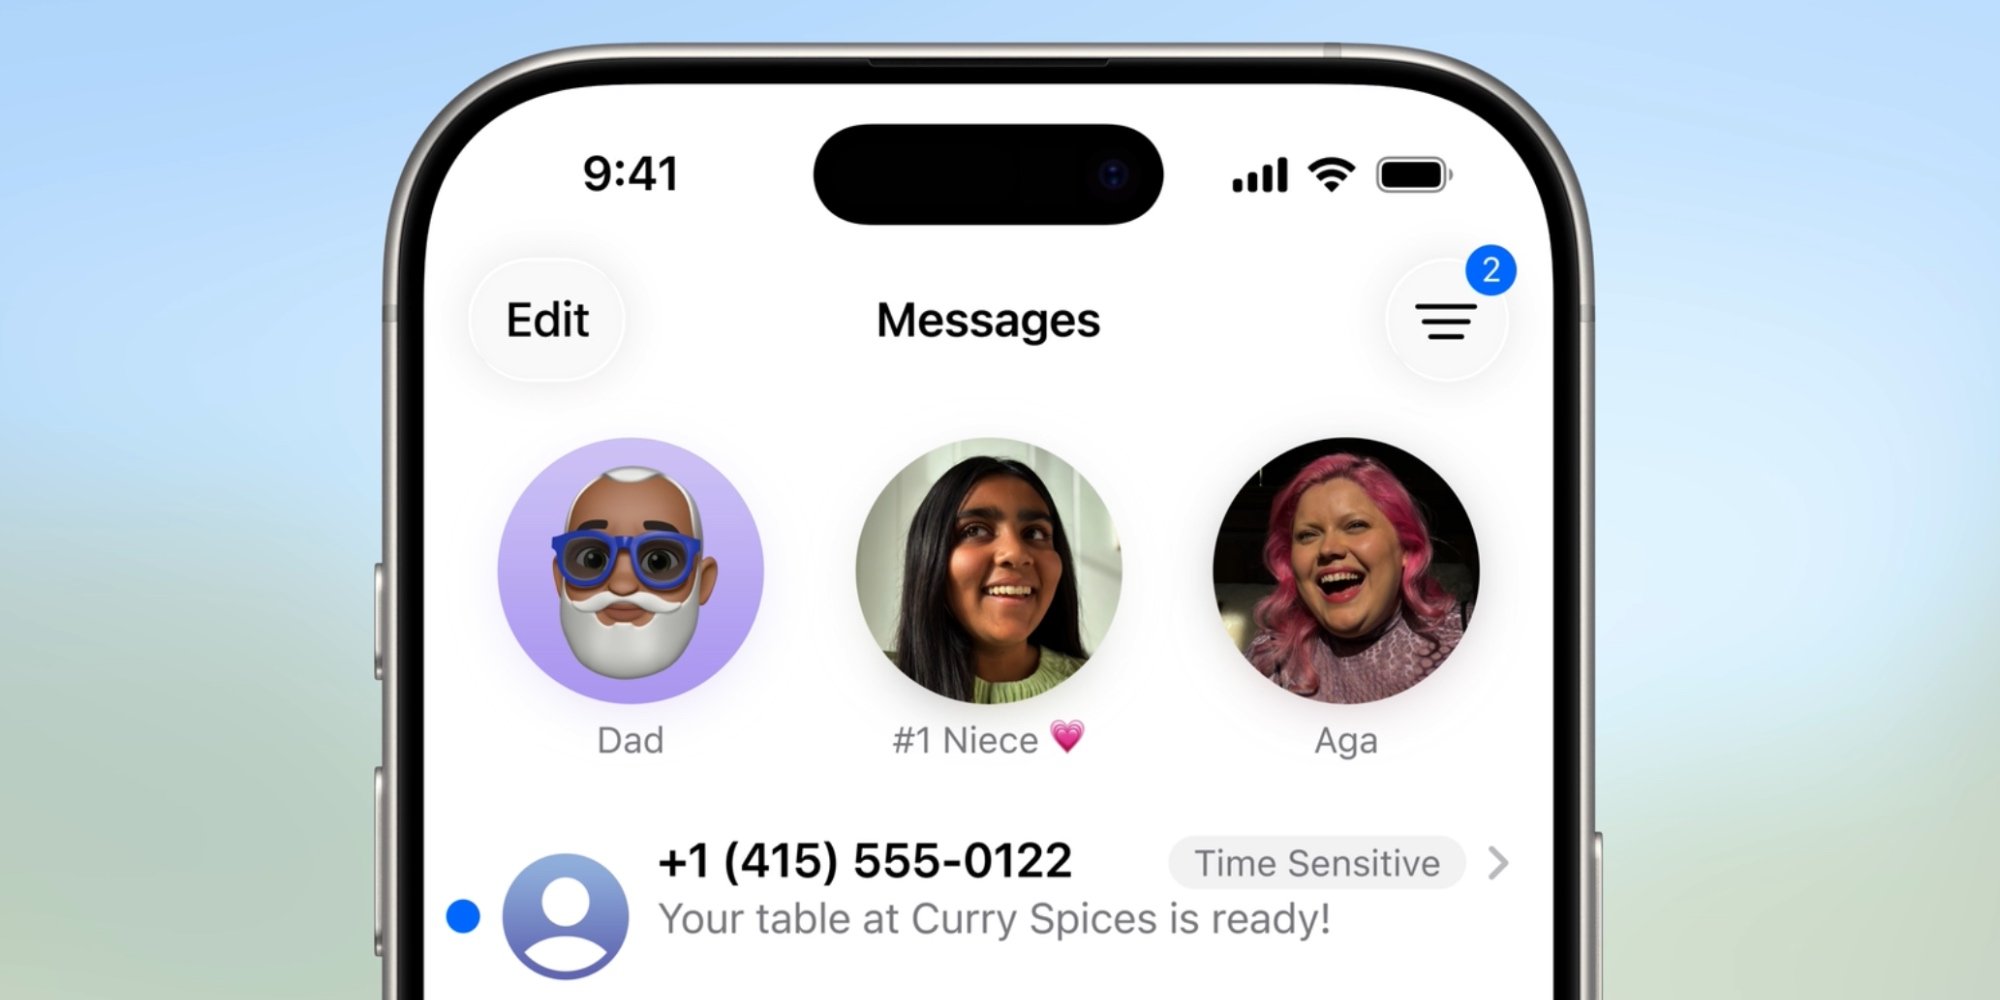
Apple introduced this feature alongside other anti-spam tools in iOS 26, including enhanced call screening in the Phone app. The concept is straightforward: Messages would identify potential spam and move it to a separate section accessible via a filter icon in the top-right corner, rather than cluttering your main inbox.
The key selling point? These filtered messages wouldn't trigger push notifications. You'd still have access to them in the dedicated 'Unknown Senders' section, but you wouldn't be bombarded with alerts every time a suspicious message arrived.
You can disable the feature entirely if you prefer the traditional Messages experience, but Apple also provides granular control over what types of messages can notify you.
My Initial Frustration
For the first few months with iOS 26, I ran 'Screen Unknown Senders' in its most restrictive configuration. Only messages marked as 'Time Sensitive' could notify me—typically verification codes or urgent delivery alerts.
This setup sounded perfect in theory, but reality proved different. I found myself missing important messages from senders I actually wanted to hear from. The feature was too aggressive, and I considered turning it off entirely.
The Hidden Settings That Saved the Feature
That's when I remembered Apple's filtering options. Inside Settings ⇾ Apps ⇾ Messages, there's an 'Allow Notifications' menu under the Unknown Senders heading. This menu only appears when you have 'Screen Unknown Senders' enabled.
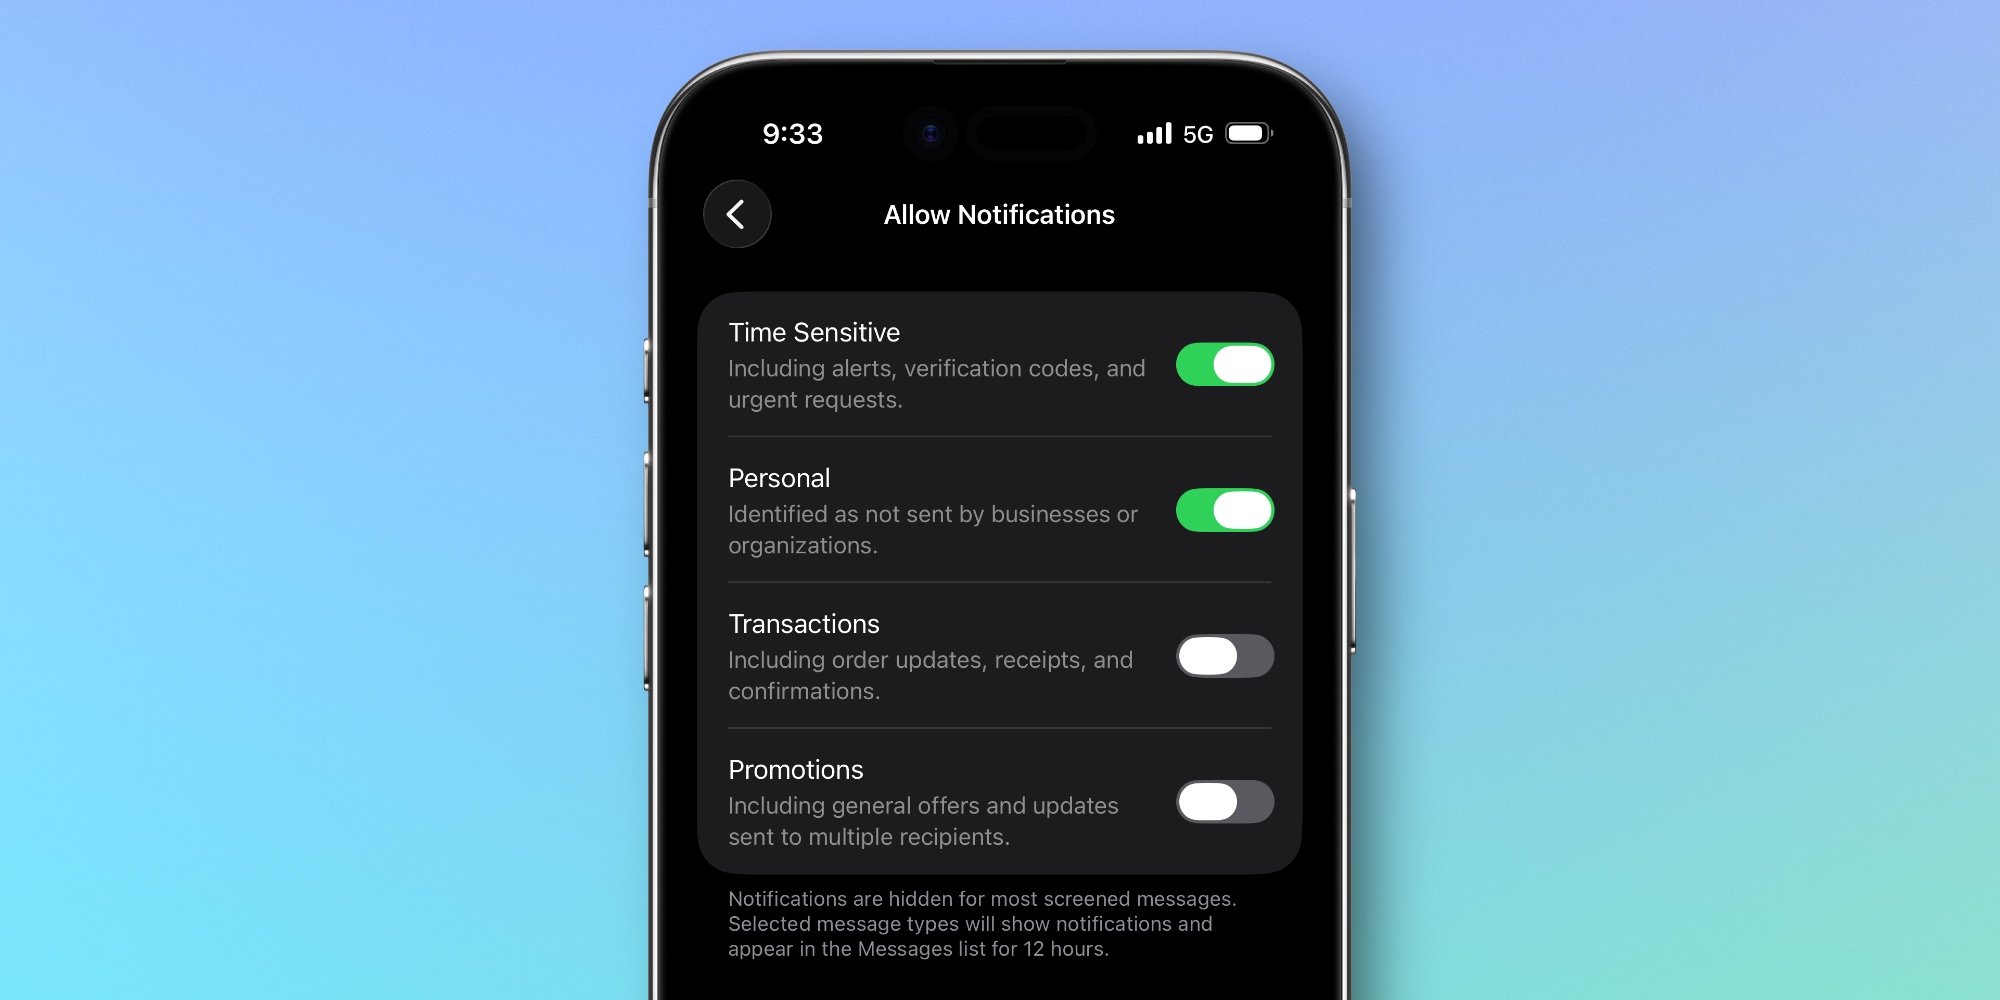
Within 'Allow Notifications,' you can toggle alerts for four distinct message categories:
- Time Sensitive: Alerts, verification codes, and urgent requests
- Personal: Messages identified as not sent by businesses or organizations
- Transactions: Order updates, receipts, and confirmations
- Promotions: General offers and updates sent to multiple recipients
Initially, I had only 'Time Sensitive' enabled. But I realized that adding 'Personal' would solve my problem of missing messages from real people.
The One Change That Made All the Difference
After enabling notifications for both 'Time Sensitive' and 'Personal' messages, everything clicked into place. The feature finally worked as intended:
- I no longer miss messages from actual people directed to me personally
- Time-sensitive notices continue to surface when needed
- All other spam gets filtered out without bothering me
The beauty of this setup is that it maintains the spam-blocking benefits while ensuring you don't miss genuinely important communications. Messages that are personal and time-sensitive get through, while promotional blasts and obvious spam stay hidden.
Is It Working for You?
Have you tried iOS 26's Messages screening tools? What's your experience been like? The granular notification settings offer a lot of flexibility, but finding the right balance might take some experimentation.
For me, that one setting change transformed a frustrating feature into one of my favorite iOS 26 additions. Sometimes the solution isn't to abandon a feature entirely, but to dig a little deeper into the options available.
Comments
Please log in or register to join the discussion