Engineers at a VR studio tackled a cascade of performance bottlenecks—from memory‑hungry indirect lighting to runaway draw calls—by re‑engineering lighting volumes and reviving a custom occlusion plugin. The story reveals how careful culling, instancing, and LOD tuning turned a sluggish prototype into a smooth Quest 2 experience.
From Lightmass to Snow Occlusion: Inside the Performance Engine of a VR Thriller
A recent post from the developers behind Mannequin details the technical journey that transformed a VR title from a performance nightmare into a polished Quest 2 experience. The narrative is a masterclass in incremental optimization, illustrating how a deep understanding of Unreal Engine 5’s rendering pipeline can unlock significant gains.
Indirect Light Memory Bloat
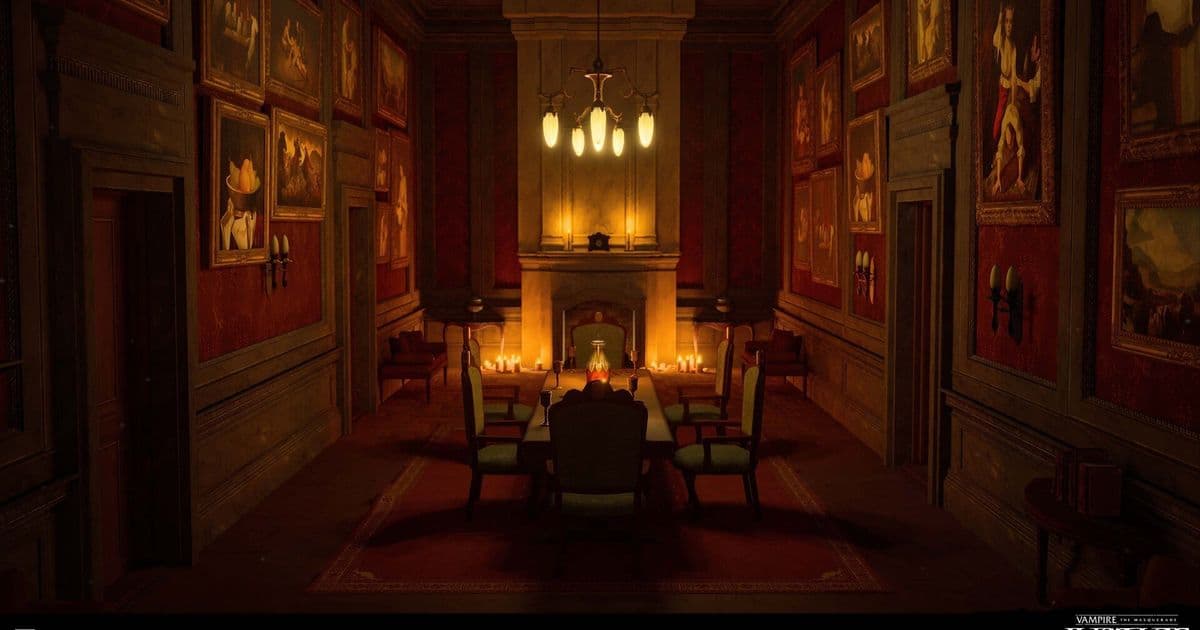
The team’s first headache was the sheer size of the lighting data. On the earlier Vampire: The Masquerade – Justice project, baking a single level’s lighting with CPU Lightmass consumed an entire day. Even after moving to GPU‑based bakes, the problem persisted.
Root cause: An oversized MapBuildData file dominated disk and VRAM usage, driven by a dense field of volumetric lightmap (VLM) samples.
The culprit was a single Importance Volume that wrapped the whole level, combined with a very small Volumetric Lighting Detail Cell Size. The result was a sea of samples scattered across empty space, as illustrated in the following diagram:
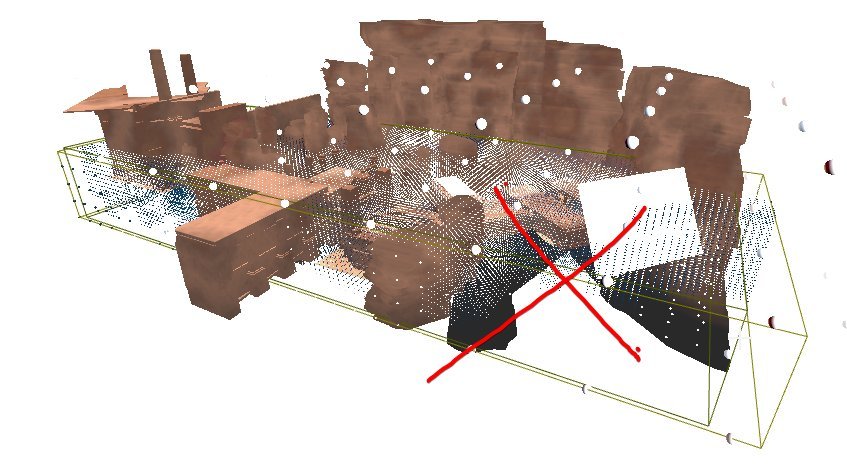
The solution was deceptively simple: replace the single volume with multiple smaller volumes that hug playable areas and increase the cell size where detail was not critical. This tweak cut bake times by hours, shrank VLM memory usage by 60–70 %, and preserved visual quality.
 )
)
The lesson—careful placement of importance volumes can deliver outsized performance benefits.
Culling Challenges in a Modular World
When Mannequin entered early production, draw calls spiked due to the modular nature of its assets. The studio had previously relied on Unreal’s Software Occlusion Queries (SOQ), a CPU‑side culling method that rasterizes a chosen LOD as occluders and tests other objects against the depth buffer.
With UE5, the built‑in SOQ option vanished, forcing the team to find alternatives that did not rely on GPU resources—critical for a Quest 2 build.
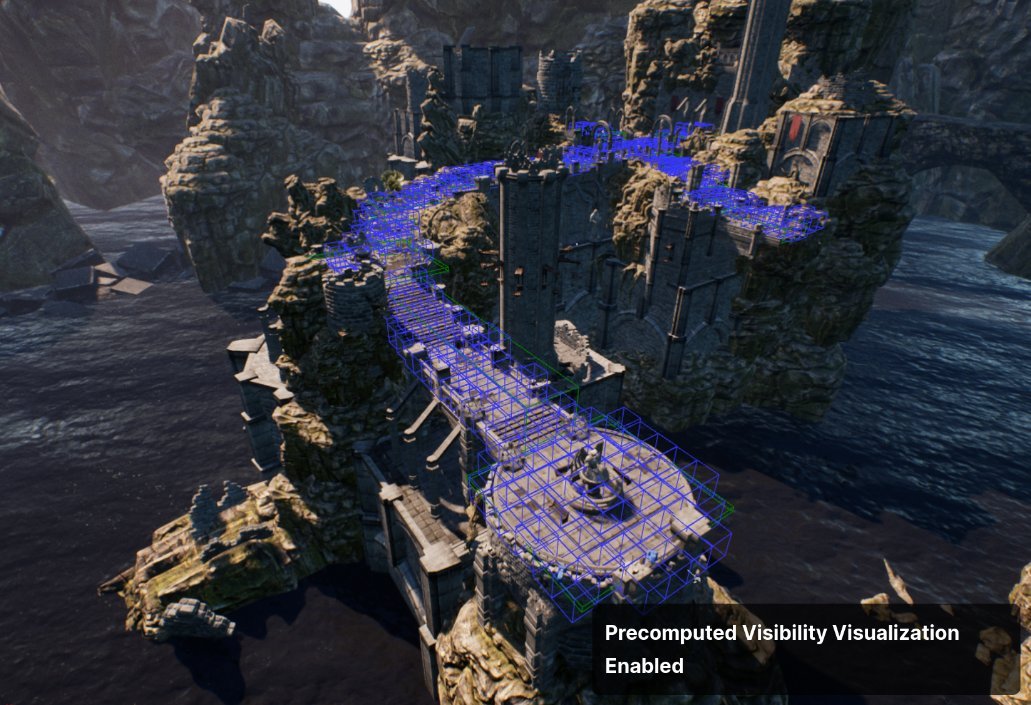
Precomputed Visibility Volumes (PVV)
PVV seemed promising: it divides the level into a grid of cells and precomputes which cells are visible from each other, turning off rendering for invisible actors. However, the system imposes strict constraints:
- All actors must live in the persistent level.
- Dynamic actors are ignored.
- The grid resolution must be fine enough to respect thin walls.
The team used a 50 cm grid, which forced a redesign of many modular walls. Thin wall modules with negative space let light bleed through the cells, breaking occlusion. Additionally, PVV only generates cells for static, shadow‑casting meshes, leaving areas like elevator shafts without any culling.
The diagram below shows how the visibility grid can expose hidden space when walls are thinner than the grid cell:
Snow Occlusion: Reviving SOQ in UE5
The studio’s CTO ported and extended the legacy SOQ to UE5, creating the Snow Occlusion plugin. The new tool added several key features:
- Custom occluder meshes – instead of relying on auto‑generated LODs, developers could supply simple meshes that seal gaps in modular walls.
- Expanded occludee boxes – a console variable (
ftg.so.ExpandOccludeeBoxes) loosened bounding‑box tests to reduce false occlusion and late pop‑in. - Dot‑push culling –
ftg.so.DotPushnudged objects forward along the view vector to prevent early culling of floor meshes. - Frustum culling toggle –
ftg.so.FrustumCullallowed the plugin to defer to Unreal’s built‑in frustum culling, smoothing artifacts during rapid head turns.
The debug view of the plugin reveals how occluders and occludees are visualized:
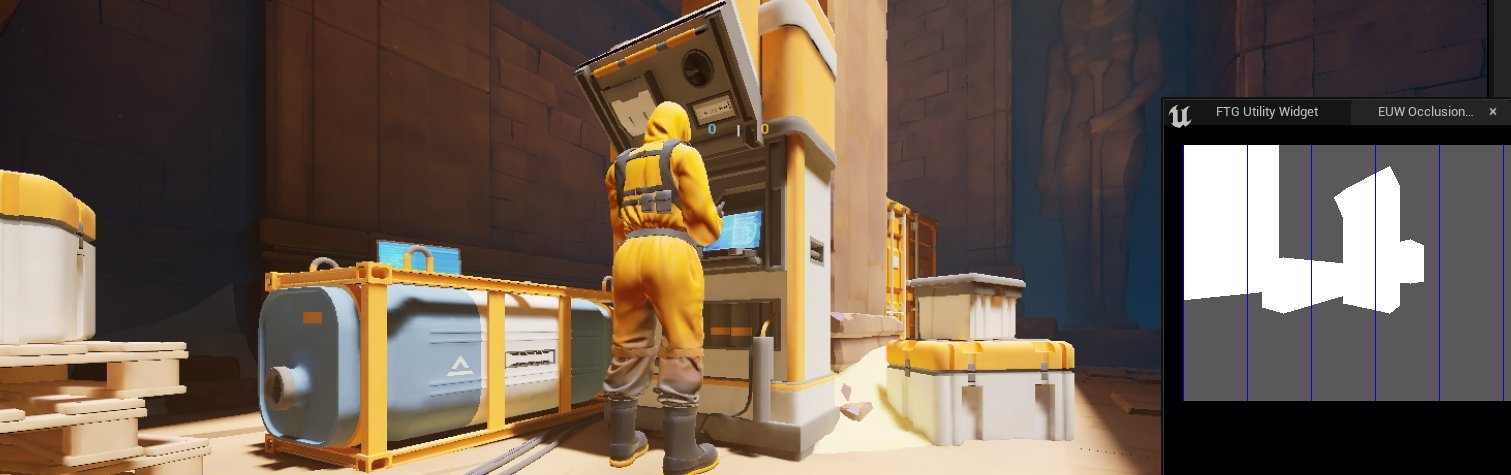
With Snow Occlusion, the team eliminated many of the strange occlusion artifacts that plagued early builds.
Distance Culling and Draw‑Call Management
Beyond occlusion, the team introduced a hierarchical distance‑culling system. Actors were grouped by size and assigned different maximum draw distances, collision profiles, LOD settings, and shadow‑casting flags. Manual adjustments were made for assets that behaved oddly.
Detail Props
A custom Mesh Detail Tool leveraged Unreal’s Detail Mode to toggle visibility per platform. On Quest 2, r.DetailMode=Low hid all meshes marked High, while on PC the same meshes remained visible. Artists could preview the effect with an overlay toggle and batch‑assign high‑detail percentages.
Manual Instancing
Unreal’s auto‑instancing proved too expensive on the Quest. The team adopted a manual instancing workflow via the Instance Tool plugin. This tool hid original actors and replaced them with Instanced Static Meshes (ISMs), dramatically reducing draw calls:
// Before instancing: 275 draws
// After instancing: 215 draws
Custom Primitive Data (CPD) and Color Atlases
To avoid creating dozens of material instances, the team used CPD to drive color variations on small props. A dedicated tool allowed batch editing of CPD values across large selections. For larger props, a color atlas combined RGB channels for tint and alpha for specular strength, further reducing material count.
LOD Bias and Editor Simulation
Per‑platform LODs were tuned to reduce triangle counts by ~75 % for characters on Quest 2. Because HMDs render at higher per‑eye resolution than the editor viewport, the team added a GameState function that adjusted the editor’s render resolution and applied cvars to match HMD LOD distances. This let artists preview LOD transitions without VR headsets.
// Pseudocode for LOD distance adjustment
void SetEditorLODScale(float Scale)
{
    // Adjust render resolution
    GEngine->SetResolutionScale(Scale);
    // Apply LOD bias cvars
    IConsoleVariable* LODBias = IConsoleManager::Get().FindConsoleVariable(TEXT("r.LODBias"));
    LODBias->Set(Scale * 10);
}
Takeaway
The Mannequin performance story underscores that high‑quality VR on constrained hardware is achievable through a layered approach: optimize lighting data, revive and extend occlusion tools, and employ smart culling, instancing, and LOD strategies. Each small tweak—adjusting importance volumes, customizing occluders, or batching CPD values—contributed to a cumulative performance lift that made a smooth Quest 2 experience possible.
The post serves as a valuable reference for developers facing similar challenges, illustrating how a disciplined, iterative optimization pipeline can turn a performance nightmare into a polished product.
Source: https://real-mrbeam.github.io/2025/12/11/Optimizing-Mannequin.html
Comments
Please log in or register to join the discussion