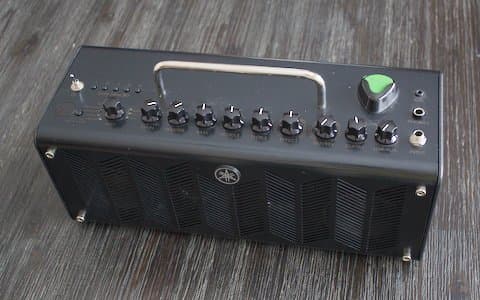
A deep dive into reverse engineering and modifying a guitar amplifier's firmware to add custom functionality, demonstrating the intersection of hardware hacking, embedded systems, and creative software modification.
The Yamaha THR10c guitar amplifier represents a fascinating case study in the intersection of traditional musical hardware and modern embedded systems. When the author set out to modify this device, they were entering a realm where most consumers rarely venture—the firmware that brings these digital amplifiers to life. What began as a simple curiosity about unpopulated headers on the service manual schematic evolved into a comprehensive firmware hacking project that fundamentally changed how the amplifier functions.
The Journey Begins: Hardware Exploration
The initial spark of inspiration came from noticing references to UART and JTAG headers in the THR10c service manual. These interfaces, typically used for development and debugging, suggested the possibility of deeper interaction with the device's internal workings. The author explains: "I had a few ideas of some changes I wanted to make to the firmware, so my main goal with this project was to find a way to dump the firmware and reflash the amp with a modified firmware."
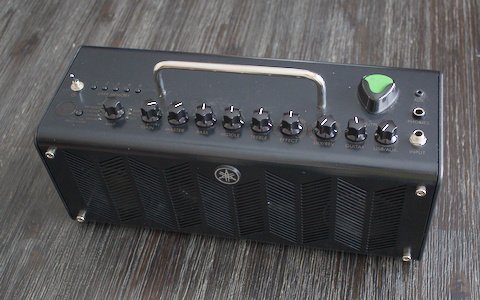 Yamaha THR10c amplifier with the newly soldered UART and JTAG connectors
The physical modification process began with carefully identifying the specific connectors needed for the UART and JTAG headers. The UART connector was identified as a JST PH series (B4B-PH-K), while the JTAG connector proved more elusive, eventually identified as a JST FMN series connector. After soldering these connectors to the main PCB, the author fed cables through slots at the back of the amp, allowing the device to remain functional during development.
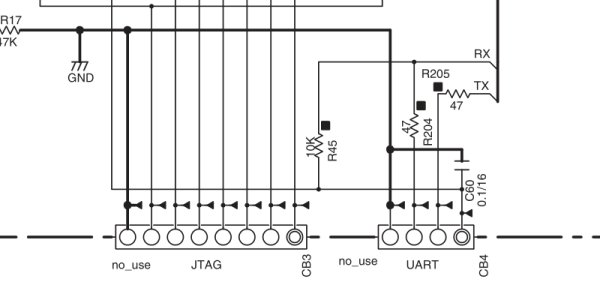 UART and JTAG headers in the schematic
The JTAG Pathway: Debugging the Unseen
While the UART connection initially yielded no results, the JTAG interface offered more promise. JTAG (Joint Test Action Group) is a serial interface designed for hardware testing, commonly used for debugging embedded processors. The author notes: "JTAG has four main pins, TCK, TMS, TDI, and TDO, which are used to interact with a state machine called a TAP controller."
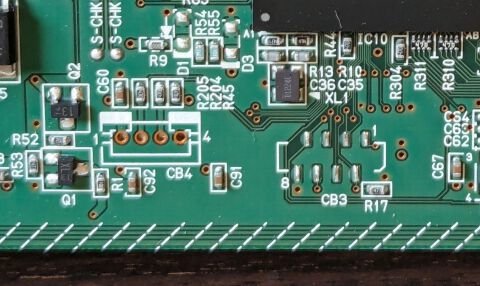 Unpopulated UART and JTAG ports on the main PCB
Using an FTDI FT2232H Mini Module as the JTAG adapter, the author connected to the amplifier and configured OpenOCD to communicate with the device. This connection provided unprecedented access to the inner workings of the amplifier, allowing memory reads, register inspection, and even stepping through code execution. The author discovered that the main processor was an ARM7TDMI-S core running in big-endian mode, operating at 12.288 MHz.
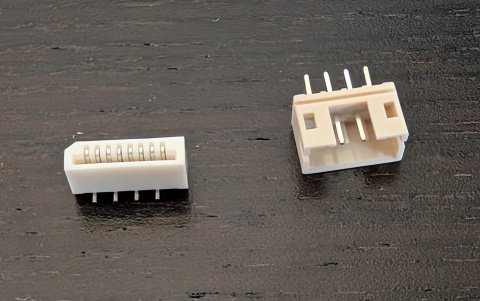 CB3 and CB4 connectors after soldering
Firmware Analysis: Decoding the Black Box
With JTAG access established, the author proceeded to dump the entire 64 MiB address space of the device, which took approximately 15 minutes. Loading this dump into Ghidra for analysis revealed a complex firmware structure with two main components: a bootloader (DTAb) and the main firmware image (DTAm).
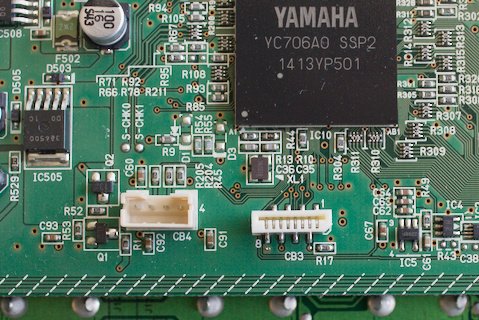 Soldered connectors on the main PCB
The firmware analysis revealed a sophisticated architecture with multiple threads handling different aspects of the amplifier's functionality—USB MIDI communication, panel I/O, and DSP processing. The author discovered that the DSP runs independently of the main ARM core, continuing to process audio even during debugging sessions. This separation of concerns represents a thoughtful design approach to real-time audio processing.
Creating Custom Features: Beyond Manufacturer Intent
The primary motivations for this firmware modification were two specific features the author wanted to implement:
- The ability to toggle the guitar speaker simulation on and off, allowing direct connection to real guitar speakers
- A mode where the internal speaker would play even when the headphone port was connected
While the stock firmware technically supported speaker simulation toggling via a special MIDI SysEx command, this approach had limitations—the setting reverted when changing amp models, and the volume increased significantly as a side effect.
The implementation involved creating a custom API to interact with the firmware's existing functions, carefully patching specific code locations to intercept button presses and modify behavior. The author explains: "I found that the function that handled button changes was at 0x2028CB8, and was called in only one location from thread 6. This was the function I needed to wrap to implement the new behavior."
Technical Implementation: Firmware Modification at the Binary Level
The firmware modification process involved several sophisticated techniques:
- Relinking the firmware: Converting the flat firmware image into an ELF object to allow adding custom code
- Patch mechanism: Creating a system to modify specific parts of the original firmware while preserving its overall structure
- API abstraction: Building a header file exposing key firmware functions for use in custom code
- LED integration: Repurposing existing LEDs to indicate new mode states
The author developed a clever patching mechanism using assembly macros to intercept specific function calls and insert custom behavior. For example, to implement the speaker simulation bypass, they modified the DSP command handling to substitute "flat" cabinet type whenever the original code would select a specific cabinet simulation.
The Update Protocol: Leveraging Existing Infrastructure
A significant achievement of this project was developing a method to flash the modified firmware using the amplifier's existing USB MIDI update protocol. The author discovered that the device could dump its firmware over MIDI in the same format used for official updates.
The firmware update format uses SysEx MIDI messages with a specific encoding scheme. The author explains: "We take 7 bytes of the firmware, clear their high bit, and collect the high bits into the 8th byte. This is similar to the scheme used by the file dump protocol described in the MIDI 1.0 specification, except that the byte of high bits comes after the data bytes instead of before."
To facilitate this process, the author created two utility programs: bintomid and midtobin for converting between raw binary images and the MIDI SysEx update format.
Future Possibilities: Expanding the Amplifier's Capabilities
Having successfully implemented the initial goals, the author outlines several potential future directions:
- MIDI 2 property exchange: Implementing the new MIDI 2 standard for parameter control, potentially enabling a CLI interface like
m2 set /chorus/depth 0.4 - Custom DSP effects: Developing entirely new audio effects by understanding and modifying the DSP processing code
- Combined "mega-firmware": Creating a firmware that includes all amp models from the THR10 family (THR10c, THR10, and THR10x)
The author notes: "There are actually three amps in the THR10 family. I have the low-gain THR10c, but there is also the standard THR10 and high-gain THR10x. Each one has a selection of five different amp models. The hardware is identical among the three amps; it's just the firmware that's different."
Reflections on Hardware Freedom
This project represents a significant achievement in consumer hardware modification. The author reflects: "I had a ton of fun on this project. One of the reasons I love open source so much is that I have the ability to change software to work the way I want. On the other hand, most hardware I bought felt like a black box. If I wanted to change something I was out of luck. After this project, I learned that it is possible to change how your hardware behaves; you just have to be very determined (and a bit stubborn)."
The source code and tools developed for this project are available at https://github.com/michaelforney/thr10, providing a valuable resource for others interested in similar firmware hacking endeavors.
This project demonstrates the potential for creative expression through hardware modification, showing how dedicated individuals can overcome the limitations of consumer electronics to create devices that better serve their specific needs. In an era where increasingly more of our musical tools are digital and firmware-locked, such projects represent an important form of creative freedom and technical expression.
Comments
Please log in or register to join the discussion