The Arctic Freezer 4U-OneX offers better performance and quieter operation than the Dynatron W23 for AmpereOne processors, with a 120mm fan design that moves more air at lower RPMs.
The Arctic Freezer 4U-OneX is what we probably should have purchased instead of the Dynatron W23 AmpereOne 3U Active Cooler that we reviewed a few months ago. As the name suggests, it is a 4U cooler that is designed to cool 8-channel AmpereOne processors. While it is about the same price (or $2 less expensive) than the Dynatron, it performed a bit better and runs quieter.
Here is an Amazon Affiliate link to what we are reviewing.
Arctic Freezer 4U-OneX Overview
Starting off, the unit is a 4U tower designed to fit into most workstation and 4U server cases. The difference between lower-profile coolers and this is enormous because 4U coolers can utilize a 120mm fan. That means a bigger fan that can move air spinning more slowly than we see on 3U coolers.
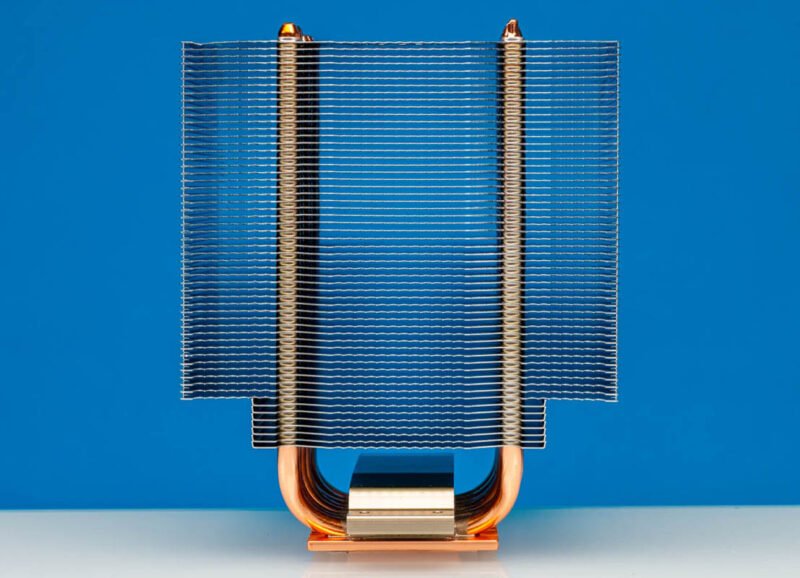
Here is a quick profile shot from one side:
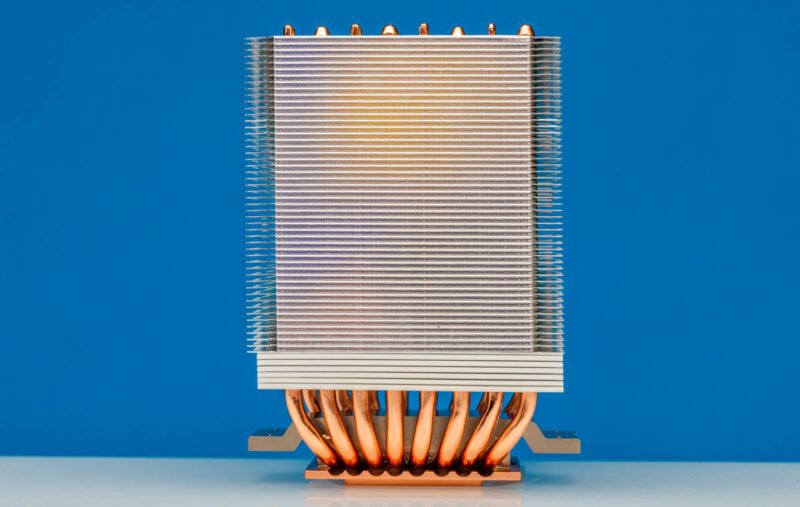
Here is a shot from the other side:
An interesting feature of the fins is that they do not have flat fronts and backs. Instead, there are many points going across the heatsink fins.
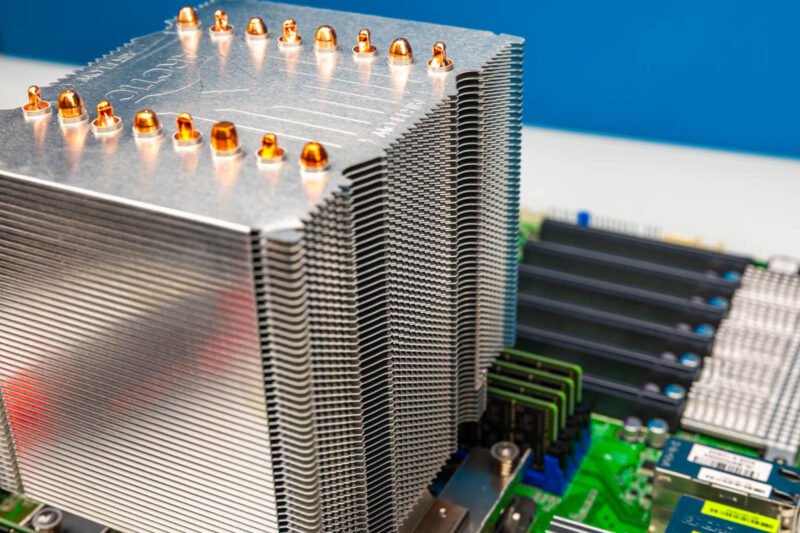
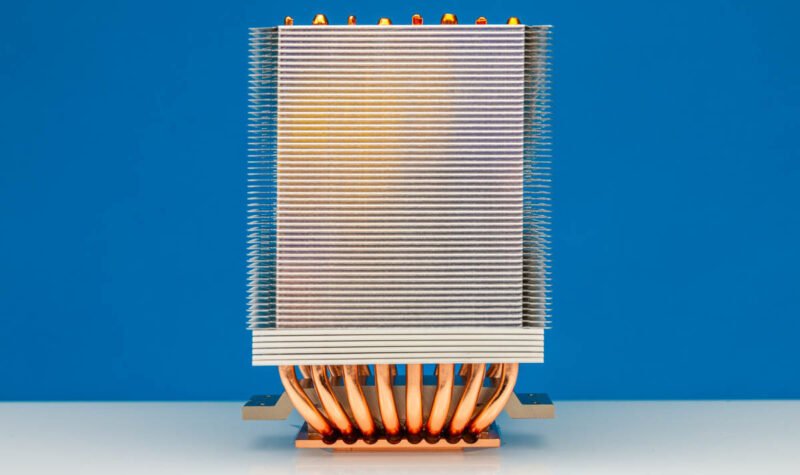
On top, we can see all of the heatpipe ends and the Arctic logo. Airflow direction is labeled on the heatsink, but we did not see the airflow markings on the fans.
On the bottom, unlike the Arctic Freezer 4U-SP5, there was a two-level block and some mounting holes for the retention brackets. That is covered by a sticker.
{{IMAGE:6}}
Pulling off that sticker, we note here a big difference between this and a typical server heatsink. Usually, server heatsinks have pre-applied thermal compound. This is more of a DIY method.
{{IMAGE:7}}
You also need to screw each retention bracket in using two screws on the bottom to get this assembled.
Due to the AmpereOne design, you also need to apply thermal interface material for the PCIe controller and memory controller chiplets. This is just another step you need to do correctly to get this working.
{{IMAGE:9}}
Here you can see the raised rows of heatsink fins to give room above the installed DDR5 RDIMMs. We did not run into any fitment issues.
{{IMAGE:11}}
In terms of fans, we get two Arctic dual ball-bearing fans. You can see they are 4-pin PWM fans, and interestingly, one has an additional connector to allow both to be powered from one fan header. We actually needed that with the ASRock Rack motherboard since it has all of its fan headers near the leading edge of the motherboard. It would have been nice to have a bit more fan cable reach as well, since server motherboards often do not have close CPU fan headers.
{{IMAGE:8}}
You also get a tube of MX-7 and the pads for the PCIe and memory controllers.
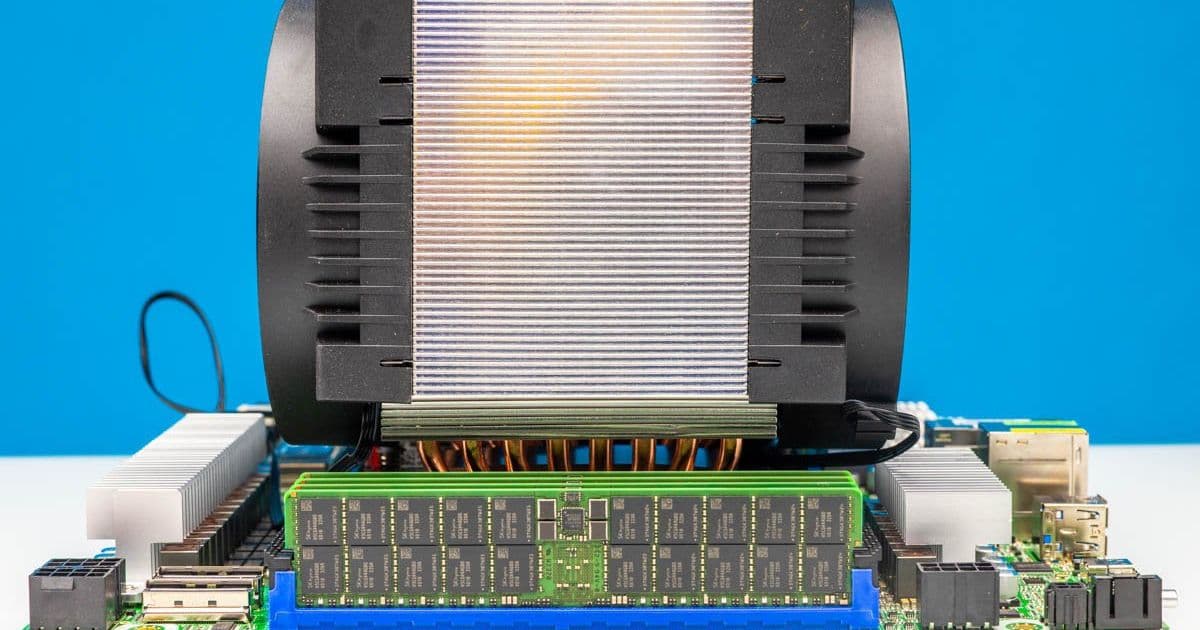
Here is another look from the other side of the ASRock Rack AMPONED8-2T/BCM, which is what I expect most people will install this heatsink in.
{{IMAGE:13}}
Here is the setup with what are now very pricey 64GB DDR5 RDIMMs.
{{IMAGE:12}}
Here is another look at having to use the extension and the mounting of the heatsink over the DIMM slots. Overall, though, this was a quick and easy installation.
Comments
Please log in or register to join the discussion